Bashes With Wolves is a semi-regular feature that takes a look at the duel-wielding badassery that is the enhancement shaman: news, tips, reviews and more. Is there something you'd like covered? Feel free to drop me a note. Elements guide you!
Hybrid classes have the most representation in World of Warcraft. That's no secret. Seven of the eleven available classes can perform at least two combat roles, while warlocks, rogues, mages and hunters are restricted to damage-dealing. A recent Blizzard Watch article on shamans looked at this distinction as it relates to spec and argued enhancement represents the last true hybrid in game. The idea is that enhancement can perform tasks effectively in combat that overlap multiple roles---healing in this case.
And in truth, it's been one of my favorite attributes of the spec, and why I've been maining the class since the Burning Crusade. I've always enjoyed having the choice to sacrifice a few GCDs of damaging abilities to ensure the raid stayed alive. Who, as a damage dealer, wouldn't love credit for rescuing their entire raid from the brink of death with some well-timed cooldowns?
Sadly, this is no longer possible. Even though enhancement shaman didn't see much at all in terms of the ability pruning most other classes saw during the weeks approaching Warlords of Draenor, the healing abilities we still have at our disposal feel rather weak. Chain Heal, Healing Tide Totem, and Spirit Link Totem became Restoration-exclusive abilities, stripping enhancement of the majority of its powerful healing cooldowns. I can understand this to a degree: those are pretty significant abilities for a damage-dealer to have. That said, the abilities we've retained---Healing Wave, Healing Rain, Healing Stream Totem, and go-to talent Ancestral Guidance---have had a serious reduction in their effectiveness.
Simply, they're not very effective.
In stark contrast from Mists of Pandaria, it's difficult to notice much of an effect from Ancestral Guidance, even when lined up with damage-increasing cooldowns. Effective usage has become a lot more situational. An instant-cast Healing Wave is but a drop in the pool that is tank health, and that GCD is almost always better spent on a damaging ability. Healing Rain feels about as powerful as a butterfly fart, but I'll still use it on occasion because it makes the floor look pretty and washes away some of the melee stink.
The point being: yes, when you look at enhancement on the surface it appears to have an amount of hybrid utility that's unique to the game. However, on closer examination, the effectiveness of the abilities really doesn't warrant their use---unless we just accept that for all these years, enhancement healing utility has just been too powerful. Now, if the raid group is relying on weak heals from their enhancement shaman to stay alive, there's likely a much larger issue at work.
While you can technically still call enhancement a hybrid spec, it's getting to the point where it feels like a hybrid-in-name-only due to the ineffectiveness of the abilities it can lend to the healing side. It leaves the spec feeling like a hollow form of its former self. The healing abilities are still there, but if you're a wise enhancement shaman you'll treat them like sculptures in an art museum.
Look, but don't touch.
Showing posts with label bashes with wolves. Show all posts
Monday, February 16, 2015
Thursday, June 12, 2014
Bashes With Wolves: It Begins!
Bashes With Wolves is a semi-regular feature that takes a look at the duel-wielding badassery that is the enhancement shaman: news, tips, reviews and more. Is there something you'd like covered? Feel free to drop me a note. Elements guide you!
Just this morning I happened to check WoW Insider earlier than normal and saw the article stating shaman weapon imbues were going passive---just like I'd suspected they would be. I commented about that on Twitter and shared a post from last summer where I looked at abilities I felt should be considered when trimming button bloat. Looking back at that post, there are some suggestions even I don't agree with anymore, but in a conversation with @unlimitedblack and @mishaweha, I mentioned how I'd like to see shields changed in a way similar to imbues.
Imagine my surprise when four hours later, Community Rep Rygarius confirmed Water Shield was gone:
@oliviadgrace @nite_moogle Yeah, that ability has been removed. Mana regen has been adjusted to compensate.
— Rygarius (@Rygarius) June 12, 2014
But obviously, there's a reason game designers have decided this ability no longer fits into their system, and though what we know now says Water Shield is going away, that could change. Either way, I don't think we have enough of the bigger picture to understand what the removal of Water Shield truly means.
Really though, Water Shield isn't meant to be the subject of this post. It's the fact that these few tidbits mean we can expect to see some sweeping changes to all shaman specs, and soon. Personally, this is a bit of a relief to me, as prior today the patch notes we've seen thus far have left shamans relatively untouched.
I'm eager to see where we go from here.
Saturday, March 1, 2014
Bashes With Wolves: Changes Afoot
Bashes With Wolves is a semi-regular feature that takes a look at the duel-wielding badassery that is the enhancement shaman: news, tips, reviews and more. Is there something you'd like covered? Feel free to drop me a note. Elements guide you!
Blizzard continues to share more information on the changes we'll see come Warlords, and though much of it has been general in scope, last Thursday's release was particularly interesting. Quite a while back in another Bashes With Wolves, I took a look at the enhancement shaman toolkit and pondered over what abilities could be cut or combined in response to a tweet by (now former) Lead Systems Designer Greg Street. When reading through Thursday's blog I couldn't help but wonder how this will affect the feel of enhancement shamanism, specifically as it relates to button bloat.
Before I go on, I must qualify that I've considered my enhancement shaman as a main since the Burning Crusade. I've followed the changes between then and now with hungry eagerness. I've been there since the necessary-but-evil requirement to drop three or four totems---one by one---because they provided important buffs, to dropping sets of four totems at once, to the incarnation we have now which sees us dropping most of our totems situationally. I noted in the post linked above that, as the state of enhancement currently stands, we could in theory use more than thirty unique abilities during the course of a boss fight.
And I love that fact.
Maybe I'm weird that way, but being able to toss out a Chain Heal or Healing Rain, Earthgrab or Capacitor Totem, and properly use Stormlash Totem is something I thoroughly enjoy. And from the tone of the last Dev Watercooler, it seems like perhaps much of this kind of class utility---including enhancement's---will be removed or greatly simplified. As Ghostcrawler said in the tweet, there will be tears, and I'm almost sure I'll count myself among those shedding them.
But it's ok; I'm not mad and whatever happens, I'll get over it quickly.
While I made a handful of suggestions about how I thought enhancement shamanism could be simplified without gutting it too much (though I didn't touch on my pre-pot>Blood Fury>Elemental Mastery>Feral Spirit>Stormstrike>Ascendance>Stormblast>Fire Elemental Totem>Stormlash Totem burst macro), there are some tools I'd really, really like to keep.
Let us keep some healing utility
I really like being the player who can help out our healers when in a tough spot. Whether it's dropping a raid-wide healing totem, popping Ancestral Guidance, or simply tossing out a Maelstrom Weapon x5 Chain Heal or Healing Rain, I like having that choice---even at the cost of my own DPS. But based on comments in the Water Cooler, I have to assume that at least some of these options will be going away for enhancement. I just hope they don't strip all of it from the toolkit.
Let us keep some CC utility
I'm not so much referring to Hex here as I am Earthgrab and Capacitor totems, and even Frost Shock to an extent. Again, this appeals to my desire to be a jack-of-all trades as an enhancement shaman, so deep down I know that some of it will likely land on the chopping block---if it hasn't already. Still, I hope enhancement will get to see more than just Hex on our toolbars come Warlords.
Let us keep most of our totems
We already know they'll be removing Stormlash. To me, that makes some sense. As a mini-Bloodlust/Heroism, it's normally used in burst combos like the one I've listed above, and often only once throughout the course of a boss fight. Still, there's not a totem enhancement shaman currently have that I don't use with regularity---save for Grounding Totem, but I swear I'd even use that often if I PvP'd. As I've pointed out in the past, I believe there are several cases where the effect of two totems can be rolled into one, but I really like having options. To me, it's what being a shaman has always been about.
In closing
On Blizzard's side of the coin, I understand the desire as well as the need for more simplicity, as it can be quite daunting to new and veteran players alike. My familiarity and love for the enhancement spec was developed over several years of play. So I'm a bit biased. Still, I just can't shake the feeling that if the enhancement shaman toolkit is stripped too much, we'll be dueling simultaneously with feelings of boredom and helplessness. And that, surely, is not what being an enhancement shaman is all about.Monday, October 21, 2013
Bashes with Wolves: Enhancement toolkit in the Vale of Eternal Sorrows
It's been a while since I took a brief look at the enhancement shaman toolkit to highlight some of the unique utility they bring to the group environment. I'm having a lot of fun in the Siege of Orgimmar breaking out that utility, whether it's helping with a healing boost when we're putting our healers to the test or something simple, but appreciated, like jumping on one of the Iron Juggernaut's Crawler Mines -- though I have only tested this in Flex, so your own results may vary.
The Vale of Eternal Sorrows contains the first four bosses in the 14-boss Siege of Orgrimmar raid. Let's take a look at how the enhancement shaman can approach these initial fights.
Immerseus
Talent Choices1: Astral Shift/Stone Bulwark
2: Earthgrab Totem
3. Totemic Persistance/Call of the Elements
4: Elemental Mastery
5: Rushing Streams/Ancestral Guidance
6. Unleashes Elements/Primal Elementalist/Elemental Blast
For T1 talents, I prefer taking Astral Shift since it's usually off CD for the first handful of times Immerseus splits and reabsorbs the puddles. However, near the end of the fight Stone Bulwark may prove a better choice for some players depending on raid healing needs, since it can be used more frequently -- players who do this should consider Call of the Elements in T3.
You should be able to take care of much of your own healing, if needed, during the split phases. Earthgrab Totem is the logical T2 choice given that it works wonderfully on hostile Sha Puddles. As enhancement, we'll be right next to Sha Puddles when they did, which provides and increased in damage done vs. other Sha Puddles.
I prefer Elemental Mastery almost always as my T4 talent unless gearing/set bonuses dictate a different talent pulls significantly ahead in damage increase. For healing utility in T5, go with what your healers need. Rushing Streams will provide passive healing to two raid members throughout the fight, but Ancestral Guidance is also a great way to help your healers quickly return the group to full health after a split phase by popping it as soon as the boss becomes attackable.
Your T6 talent is really dictated by the gear you're wearing. I use Icy Veins for reference, but feel free to rely on your own resources.
Glyphs: Glyph of Healing Storm, Glyph of Fire Elemental Totem, Glyph of Flame Shock, Glyph of Spirit Walk, Glyph of Capacitor Totem
While each shaman major glyph could be useful for this fight with the exception of Purging, the ones listed above are the most ideal -- you just need to decide which three will be the best for your raid. If you'll be tossing out extra heals, definitely take Healing Storm. By default, I almost always take Flame Shock and Fire Elemental Totem, but if you're going to be running well across the room to handle puddles during a split phase, consider Spirit Walk. Capacitor Totem may be used situationally, especially if you have a large group of Sha Puddles in close proximity.
Key Abilities: Ghost Wolf to move around the floor quickly when needed. Shamanistic Rage coupled with Astral Shift translates to minimal damage taken during a split phase. Our group normally uses Bloodlust at the start of the fight.
The Fallen Protectors
Talents1: Astral Shift/Stone Bulwark
2: N/A
3. Totemic Persistance/Call of the Elements
4: Elemental Mastery
5: Rushing Streams/Ancestral Guidance
6. Unleashes Elements/Primal Elementalist/Elemental Blast
Again, T6 will be largely depending on your gear and preference.
Glyphs: Glyph of Healing Storm, Glyph of Fire Elemental Totem, Glyph of Flame Shock, Glyph of Chain Lightning
Each major glyph has potential utility here, again, it will depend on your preference and what the raid needs. I tend to toss out quite a few heals in this fight, since we're currently testing our healers in Flex, and tend to stick with Flame Shock and Fire Elemental. However, if your group is having any trouble at all with Sun's transition phase, Chain Lightning can provide additional AoE damage.
Key Abilities: Shamanistic Rage couple with Astral Shift translates to minimal damage taken during intense parts of the fight. I'm able to "tank" He's Mark of Anguish for a good while, if needed, when under the effect of these damage-reducing abilities. Wind Shear for interrupting Gloom. Our group normally casts Bloodlust at the start of the fight, though some groups choose to save it for the final burn phase.
Norushen
Talents
1: Astral Shift/Stone Bulwark
2: N/A
3. Totemic Persistance/Call of the Elements
4: Elemental Mastery
5: Rushing Streams/Ancestral Guidance
6. Unleashes Elements/Primal Elementalist/Elemental Blast
Stone Bulwark may be a good T1 choice given the frequency of raid AoE damage coupled with the frequency in which you can use the ability. Players making this choice should consider Call of the Elements in T3. Your T2 talent choice won't really affect this fight, but I stick with Earthgrab in case I get the attention of a large add. Elemental Mastery is again my personal choice based on how I play the spec. For T5, I always go with Ancestral Guidance, since there can be nasty raid-wide AoE damage -- being able to put out a decent about of HPS for a controlled period can be extremely helpful on this fight.
Glyphs: Glyph of Healing Storm, Glyph of Fire Elemental Totem, Glyph of Flame Shock, Glyph of Feral Spirit
The passive healing from Flame Shock can really help here. If you're supporting with heals, always go with Healing Storm. Otherwise Fire Elemental will provide some extra DPS when you need it, or Feral Spirit will keep you alive during a healing-intensive part of the fight.
Key Abilities: Shamanistic Rage coupled with Astral Shift translates to minimal damage taken during intense parts of the fight. Wind Shear for interrupting the smaller adds that surround Norushen. We use Bloodlust around 50% when all of our designated DPS are purified.
1: Astral Shift/Stone Bulwark
2: N/A
3. Totemic Persistance/Call of the Elements
4: Elemental Mastery
5: Rushing Streams/Ancestral Guidance
6. Unleashes Elements/Primal Elementalist/Elemental Blast
Glyphs: Glyph of Healing Storm, Glyph of Fire Elemental Totem, Glyph of Flame Shock, Glyph of Feral Spirit
The passive healing from Flame Shock can really help here. If you're supporting with heals, always go with Healing Storm. Otherwise Fire Elemental will provide some extra DPS when you need it, or Feral Spirit will keep you alive during a healing-intensive part of the fight.
Key Abilities: Shamanistic Rage coupled with Astral Shift translates to minimal damage taken during intense parts of the fight. Wind Shear for interrupting the smaller adds that surround Norushen. We use Bloodlust around 50% when all of our designated DPS are purified.
Sha of Pride
Talents1: Astral Shift/Stone Bulwark
2: Earthgrab Totem
3. Totemic Persistance/Call of the Elements
4: Elemental Mastery
5: Rushing Streams/Ancestral Guidance/Conductivity
6. Unleashes Elements/Primal Elementalist/Elemental Blast
You can use your Earthgrab Totem to keep the small adds that spawn in one place, but your raid should be stacked tightly anyway, possibly negating any need for doing so. Also, super-smart shamans will time their Capacitor Totem to go off just after the small adds have spawned.
I'll still with Totemic Persistence in case I ever have to drop two water totems to help with heals. T4 is again my personal choice, while I again choose Ancestral Guidance for T5 for the controlled burst heals. However, since the raid is stacked up for the vast majority of this fight, Conductivity should be considered depending on the raid needs.
Glyphs: Glyph of Healing Storm, Glyph of Fire Elemental Totem, Glyph of Flame Shock, Glyph of Chain Lightning, Glyph of Capacitor Totem
Choose what your raid needs here. If you're not helping at all with heals, go with the situational damage-increasing abilities.
Key Abilities: Shamanistic Rage coupled with Astral Shift translates to minimal damage taken during intense parts of the fight. MWx5 Healing Rain may also come into play here -- if you will be helping out this way, consider T5 talent Conductivity. Our group uses Bloodlust at the 30% mark when all accumulated Pride resets.
Good luck...may all of your hits be Windfury procs!
Sunday, August 18, 2013
Bashes with Wolves: Enhancement ability purge for the next expansion
I should really make the time to visit Ghostcrawler's Twitter feed more often to read all of his @replies, because that seems to be where many of the juicy bits come from. Even when he's speculating or sharing his own opinion, like when he mentioned removing flying mounts from the game, there's regularly good info that's fun to speculate on. Like a recent reply to a player who felt that new abilities for their class would become too much, i.e. in the next expansion. Ghostcrawler confirmed there will be some changes, and it's likely that "there will be many tears."
Oh boy.
This caused me to take a look at my own enhancement shaman's toolkit...and my word! Perhaps it's because I've been playing the spec as my main since the end of the Burning Crusade, but it hadn't dawned on me that in the course of any given boss fight, an enhancement shaman could use more than 35 unique abilities. I assume it's similar for many classes. I went ahead and listed those abilities as they relate to how I use them, but that bit got a little long so I've left that part out of this post.
In summary, enhancement shaman must use 3 abilities just to prepare themselves to fight. In their opening burst sequence, which does draw on their regular rotation, they're using 6 more abilities. Depending on the situation (single target, multiple targets, healing intensive, etc) their regular rotation will contain the potential for 7 more unique abilities. As it currently stands, their utility toolkit---heals, totems, and unique actions---add another 19 (or more) abilities to the mix. Let's see if we can't whittle that down in preparation for the next expansion.
The Purge
Granted, an enhancement shaman may not use all of their 35+ abilities in fight, but they'll surely use a majority of them. Keeping the next expansion in mind, which is rumored to take us from level 90-100, players can assume there will be a new ability or two for their class. But I'd argue we can't continue to have new abilities without purging or combining some of the old ones. I'd entertain:Default weapon imbues. Enhancement shaman would no longer actively set weapon imbues; the main-hand weapon will be auto-imbued with Windfury Weapon while the off-hand will be auto-imbued with Flametongue Weapon. To avoid confusion, enhancement shaman would become dual-wield-only. Rockbiter and Frostbrand weapons are removed from the game. The talent Frozen Power now augments a player's Flame Shock to root the enemy in ice for 5 second and slow their movement speed by 30% for an additional 3 seconds.
Frost Shock is removed from the game. The effects of the ability have been rolled up into the talent Frozen Power and now affect the shaman's Flame Shock.
Magma Totem and Searing Totem combine into Searing Magma Totem, now a passive ability. The totem repeatedly attacks an enemy within 25 yards and causes Fire damage to all creatures within 8 yards every 2 seconds. Additionally, the totem is no longer dropped on its own, and is summoned/refreshed each time the shaman applies Flame Shock to a target.
Lightning Bolt and Chain Lightning combine into Lightning Chain. The shaman releases a chain of lightning, damaging the enemy target and jumping to additional nearby enemies.
Lightning Shield is no longer actively applied. It's a default buff for enhancement shaman similar to how they currently provide buffs.
Unleash Elements becomes a passive ability. Its affect applies automatically, triggering a 15 second cooldown.
Healing Stream Totem becomes Restoration-only. Shaman are left with movement freeing/restriction totems, Capacitor Totem, Grounding Totem and their large-CD elemental totems.
Bind Elemental and Hex merge to become Elemental Bonds. Binds the hostile target for up to 50 secs. The bound target is unable to move, attack or cast spells. Any damage caused will release the target. Only one target can be bound at a time. Works on humanoids, beasts and elementals.
Purge and Cleanse Spirit combine into Purification. Removes all Curse effects from a friendly target or removes 1 beneficial magic effect from an enemy target.
If we go with what's listed above, it would reduce the number of possible enhancement abilities by more than a third. What's more, it removes several abilities from the shaman's main rotation, potentially freeing up those spots for new abilities in the future. It also prevents some simple user errors, like forgetting to apply Lightning Shield or use the correct weapon imbues.
Do you think the enhancement toolkit can use some trimming? Or if you have a different main class, what changes or cuts would you make?
If you'd like to see how this could look for Shadow Priests, head over to UnlimitedBlack's blog Power Word: Remix.
Monday, May 6, 2013
Bashes with Wolves: 5.3 brings the powah
Come Patch 5.3, enhancement's getting enhanced, baby. Aww yeah.
There's rarely anything wrong with enhancement shaman, right? If you love playing one like I do, you know exactly what I mean. Leading up to a major content patch, we head over to the official notes and scroll down to the Class Changes section. Mage...keep scrolling...Priest...Rogue...keep scrolling...Warlock. Hmm. Guess shammy's are fine! Maybe I just want to believe they're fine, but it really doesn't seem like our class is often rocked by huge changes in the midst of expansions. Sure, we've gone from using four GCDs to drop totems to dropping four totems at once to now dropping them one at a time situationally -- but other than that, our rotation has been largely unchanged since Wrath of the Lich King.
That said, the DPS charts over at World of Logs don't show enhancement shaman near the top. It's not that we can't DPS. We can, and do quite well. It's just that there are several other classes that do exceptionally well. And that's fine. We bring enough of our own utility to the game to earn a spot on the team. Needless to say, I was a bit surprised when I saw that in 5.3, we get buffed! Nothing huge, but significant enough so that we should see a small boost to our average DPS. Let's take a look.
Boundless Wolves
Our Spirit Wolves will be immune to roots and snares. No more badly-timed uses of this signature enhancement cooldown. Your wolves were born to run free!
I Buff You, Stormstrike and Lava Lash
Both Stormstrike and Lava Lash are having their damage increased. Stormstrike will deal 450% weapon damage, up from 375%, and Lava Lash now does 300% weapon damage, up from 250%. Nice, right?
Brain Runs Faster
Perhaps someone will get that joke, but Mental Quickness will convert 65% of our attack power into spell power, up from 55%. Well all-friggin-right. Most of our abilities will benefit from this change. Quite awesome, overall.
And Then, a Curious Change
Lightning bolt can now be cast while moving. Huh. Needless to say, there are some movement-heavy fights in this expansion, especially for melee players. At first, I sort of glossed over this change and failed to see any significance, but having had some time to reflect, I've decided that it'll be fun as heck to keep my DPS rolling just a bit when on the run, especially when my Flame/Earth Shock is on cooldown. Since it's only Lightning Bolt, and not Chain Lightning or even a heal, Spiritwalker's Grace will still be the go-to in movement-heavy situations for elemental and restoration shaman. But we don't talk about those specs around here.
Because of the change to Lightning Bolt, Glyph of Unleashed Lightning becomes useless, and thus will be removed from the game. Glyph of Lightning Shield, which causes Lightning Shield to reduce the amount of damage taken by 10% for 6 seconds after Lightning Shield is triggered, will be added in its place. No big deal, right? Wrong. Enhancers choosing this glyph will take reduced damage quite often throughout an encounter. It's a miniscule reduction for sure, but over time adds up and should be regularly considered for a Major Glyph slot. While I normally roll with Glyph of Fire Elemental Totem, Glyph of Flame Shock, and Glyph of Healing Storm, it's a clear frontrunner if you're not concerning yourself with tossing up insta-heals or HOTing yourself to help out your raid's healers. A combo of Fire Elemental, Flame Shock and Lightning Shield sounds sexy to me.
All in all, this patch will bring a nice little boost for enhancement shaman across the board. No nerfs, no weird changes, just a bit of a damage increase and the ability cast Lightning Bolt while moving. I'm anxious to see how the changes play out on live servers.
Read the official notes here, and til next time, keep bashing!
Monday, March 18, 2013
Bashes with Wolves: Enhancement shaman talent toolkit
It may sound like I'm bragging when I say I've counted enhancement as my main since the Burning Crusade, but I'm not. It's a fact! I love playing enhance, period. The hybrid nature of brute force and spell damage has always felt right to me. In MoP, talents are much more situational, meaning we have the ability to change talents as the mechanics call for it. For questing, raiding, and even PvP, players have choices.
Let's take a deeper look at the talent tree and be all the shaman we can be. We're going to know when to pop Ancestral Swiftness to help out our healers, and when dropping Windwalk Totem will be an asset to the raid. That's right. We're going to be the most useful badasses this game has ever seen.
Tier One
The life-prolongers.Nature's Guardian: Choose this talent if you don't want to worry about hitting another button for survivability situations. Given that it can trigger once every 30 seconds, it's actually pretty good. The catch is that once triggered, you need to be healed up quickly, as the health gained from the ability is temporary.
Stone Bulwark Totem: This will absorb damage for 30 seconds, and being that it has a 1-minute CD, that's a decent amount of uptime. Fights with constant, annoying damage call for this totem as it can provide some relief to the healers.Astral Shift: Though a relatively short duration and long cooldown, this is my go-to talent. When paired with Shamanistic Rage, it can mitigate some serious damage. It's been good to me when out questing, and good to me in raids.
While the choice within this tier is really up to player preference, in some situations, an ideal choice will be clear. As shaman, it's up to us to recognize when that is.
Tier Two
I like to move it, move it. Movement!Frozen Power: Truth is I don't ever use this talent. Perhaps it emerges as the clear winner in PvP situations, but its limitation lies in the fact that it only CCs one target. Shaman already have a single-target CC with Hex, and there's another talent in this tier that will root multiple targets at once.
Earthgrab Totem: While personally I feel the claim it "ensnares the legs of all enemies within 10 yards" is a bit grandiose, I often choose this talent. It's great for escaping a sticky situation when questing, though its use in raids is rather limited.
Windwalk Totem: This one actually grants a short duration of immunity to movement-impairing effects. If you raid, I'm sure you can think of several scenarios where this might be helpful. Since I don't strategically PvP, I can't comment on its usefulness in battlegrounds and arenas.
Overall, your choice in this tier will depend on this situation. Nine out of ten times, I go with Earthgrab when questing, though rely on Windwalk for some raids fights. Is it necessary for those raid fights? No, it is not. However, it can provide a small quality-of-life boost, even if for only six seconds, that your fellow raiders will appreciate.
Tier Three
And now, a perk for your totems.Call of the Elements: This can be useful for reasons related to your Tier One and Two choices, as this ability essentially allows shaman to drop back-to-back Earthgrab/Windwalk, Healing Stream, Capacitor and Stone Bulwark totems, to name a few.
Totemic Restoration: I most often use this talent because of Fire Elemental Totem. If I ever have to hit my "OH S%$T" sequence after taking on more than I can handle, the threat is usually neutralized within 30 seconds, meaning if I recall my totems I'll be refunded a significant amount on the elemental's CD.
Totemic Projection: Very situational, but I have heard tales of its merit PvP. From a PvE standpoint, shaman would only choose this if they anticipate the need to move a LOT during the course of a fight.
I run with Totemic Restoration 90% of the time. It doesn't add another button to my bars, and I don't see too much use in the other two choices as they pertain to my playstyle. I will admit that Call of the Elements probably has more utility than I'm giving it credit for.
Tier Four
Go forth and augment thy damage, young shaman.
Elemental Mastery: A personal Bloodlust every minute and a half. Not bad. Very good on fights where you temporarily deal increased damage. Though situational, skilled shaman will choose this in situations that will benefit them the most. Think Jin'rokh, Elegon & Gara'jal.Ancestral Swiftness: The passive haste is interesting, but its other function doesn't appeal much to me, though I will choose this when I'm healing in my offspec. Know it's not wrong for enhancers to choose this talent. I just don't prefer it.
Echo of the Elements: The "choose it and forget it" talent for this tier.
By all accounts, and with all else equal, these talents perform similarly, though certain fight mechanics may lend well to specific choices as alluded above. I choose Echo in all cases except for those where I do increased damage for short durations during a fight, like Elegon and Gara'jal.
Tier Five
Cause it's not enhancement without the heals.Healing Tide Totem: Drop it and forget about it; powerful heals for 10 seconds with the drawback being its 3-minute CD.
Ancestral Guidance: Heals the raid, but very dependent on the shaman's DPS. Players must make sure they are in a position to do a good amount of damage for its 10-second duration to ensure this talent lives up to the other choices in this tier. The shorter CD is also appealing.
Conductivity: Can be good in situations where the group is often stacked together AND your healer could use some extra help.
These talents should perform relatively the same when used correctly. While Healing Tide might seem like an easy choice, I've really had a lot of fun with Ancestral Guidance. Time its use with a burst CD or two and we can easily put out 150k damage per second. Then 40% of that number gets copied to nearby allies as healing every second for 10 seconds? Yes please. During one particular nasty end to Feng kill where we had no healers alive, I popped my damage CDs with Ancestral Guidance and essentially negated the damage done to the raid for one entire channeling of Arcane Velocity.
Tier Six
The capstone: choose a way.Unleashed Fury: The "choose it and forget about it" talent in this tier; however, choosing this means you should use Unleash Elements whenever it's off CD.
Primal Elementalist: Trying saying that fast, and five times in a row! Prollomollolumpulus. That's what I get on the second try. Anyway, this makes your elementals look cooler and act even more OP.
Elemental Blast: Adds an ability to the shaman rotation that didn't exist prior to MoP. If you haven't tried this and find yourself bored with the traditional rotation, or are feeling adventurous, check this out. You'll want to make it a priority and use it whenever it is off CD.
According to other resources I read, such as Icy Veins, these all perform equally when played right, with Primal Elementalist pulling ahead for shaman in T15 gear. So, for the most of us, there's isn't a "best" choice currently.
I'll admit, I am having a fun time with the talent system and how it's set up for situational utility. It allows players to make choices that are smart, even if optional, so they can play their character in a significantly different way than someone else. Not only do I have my personal setups for when I'm out questing, but I'm able to swap in specific talents if a boss fight mechanic calls for it. And I really like having that choice.
What about you? Do you take full advantage of the more niche abilities in your talent tree?
(all icon images credit wowwiki)
Friday, March 1, 2013
Bashes with Wolves: 5.2 changes for your enhancement shaman
With 5.2 literally just around the corner, I must say that I've never been unhappy with enhancement shaman DPS. Not since I began playing it seriously near the end of the Burning Crusade (yes, once I find a flavor I like I stick with it). Granted, I'm not in a hardcore guild claiming a spot anywhere near the bleeding edge, but I'm still having fun.
Though I must be honest: I haven't really taken advantage of the flexibility of the redesigned talent system that shipped with this expansion. The potential for situational builds is impressive, though I haven't done to much aside from swapping out Stone Bulwark Totem for Astral Shift. But next week's (fingers crossed) patch demands a closer look at how I approach the class.
5.2 will usher in some subtle, yet interesting changes for us, but they are changes that don't really affect our DPS one way or another. In this post, I look at a handful of the most impactful changes. Disclaimer: I'm not a numbers, spreadsheets or SIMS guy. Mathematics and I don't get along in general. So you won't find any of that here. That might make me a hack to some and endeared to others. To each their own. Oh, and please excuse the fact that all of my raid boss references are limited to Mogu'Shan Vaults. It's been a slow, slow tier for our guild.
TL;DR: Damage largely unaffected, some nice quality-of-life improvements.
I don't know if it's the way the tooltip is worded or if it's the limitations of my brain, but this change confuses the shit out of me. Perhaps a fellow enhancer who uses it can weigh in.
At present, Conductivity causes certain damaging attacks to heal your allies standing in your Healing Rain if the enemy or enemies you're attacking are also standing in your healing rain. Phew. Yeah, it can't be just me. So the question is, stack much? Answer: nah, just occasionally, and for short durations, so this talent kind of sucks for enhancement, although elemental shaman may report having a better time.
5.2's change doesn't do much to change its attractiveness for enhance. The major difference is that your target no longer needs to be standing in your healing rain, meaning damaging any enemy no matter where they stand will now provide additional healing to allies so long as they are standing in your Healing Rain. That's less confusing, right? This assumes you even want to use a global CD to toss about an instant-cast Healing Rain. Mmmmmeh.
If any enhancement out there can think of a situ where this talent rocks it, let me know.
Neeto. In the past I've reserved Chain Lightning for fights with three or more targets. This change will definitely affect our AoE damage, but won't do anything to single-target DPS.
When the pre-MoP patch dropped, I chose all passive talents in order to grow accustomed to any new quirks in the rotation. Given that, I haven't really messed with this talent, though it does offer a significant benefit on fights with critical burn phases, or fights where players do increased damage. Essentially, it provides us a personal Bloodlust every 90 seconds. The reduced CD in 5.2 brightens its appeal and I will be trying this out. Elegon, Will of the Emporer and Gara'jal come to mind.
Personally, I've stuck with Echo of the Elements for this entire tier; had DPS been the reason why our guild progression was slow, I would have experimented more. With this talent's buff to melee haste come 5.2, I'm still having a hard time identifying fights where it would have the clear advantage. Perhaps the fact this is changing ONLY for enhancers is a sign of Blizzard trying to make this talent seem more appealing. If that's the case, I'm not sure it worked.
The most appealing aspect of this talent to me has always been its relatively short cooldown. Using either this talent or Astral Shift with Shamanistic Rage provides massive damage reduction. From what I can tell, Stone Bulwark Totem would be best chosen for fights with regular, constant damage where as Astral Shift may be better for fights where there are instances with high damage spikes.
I choose this talent when leveling to 90, but once the guild began raids, I put my trust in our healers and opted for Astral Shift to steal of a few more seconds of aliveness during those really sticky situations, like when I shaman tank. You see, enhancement shaman tanking isn't a choice. It's a lifestyle.
Now, where did I put that.....aha! NERF BAT! No, not really. We get a slight reduction to the damage this talent effect provides, meaning it will ever-so-slightly decrease our single-target DPS. It's not a nerf.
Prior to 5.2, most theory-crafters I rely on maintained that Glyph of Flame Shock was mandatory for enhancement shaman. Why? Flame Shock's increased duration keeps the global cooldown freer for longer, increasing overall damage. Blizzard seems to have acknowledged its mandatory nature by incorporating the glyph's function into the base ability: come 5.2, Flame Shock's duration has been increased by 25%.
Applying the glyph causes the shaman to heal for 30% of the damage done by Flame Shock. This may mean we have some more interesting choices when it comes to filling that glyph slot.
Mwahahahahaha. I really like this talent. The sheer utility of the shaman is probably one of the reasons it soon grew to be my favorite class. When timing its use with some of my damage cooldowns, it can really help our raid healers in a pinch. As we mentioned earlier, Conductivity is a moot choice, so that leaves Healing Tide Totem, a talent I opted for at the start of the expansion. Now that I have more control over my burst, I've found Ancestral Guidance to be more beneficial overall, even if it heals only the 3 nearest raid members as opposed to Healing Tide Totem's five.
And now we get to do even more healing? Count me in.
This. is. huge. To me. I'm a baaaaaaad shaman, and don't have Spirit Walk keybound. It will remain that way until 5.2, because with a 1-minute CD, this thing will become extremely useful. Perhaps only situationally in raids, but for day-to-day getting around? Mmm hmm.
There are some other minor changes in the official notes, like the change to the AoE damage cap, but nothing earth-shaking. What about you? What has you most excited about these looming changes to enhancement shaman?
Though I must be honest: I haven't really taken advantage of the flexibility of the redesigned talent system that shipped with this expansion. The potential for situational builds is impressive, though I haven't done to much aside from swapping out Stone Bulwark Totem for Astral Shift. But next week's (fingers crossed) patch demands a closer look at how I approach the class.
5.2 will usher in some subtle, yet interesting changes for us, but they are changes that don't really affect our DPS one way or another. In this post, I look at a handful of the most impactful changes. Disclaimer: I'm not a numbers, spreadsheets or SIMS guy. Mathematics and I don't get along in general. So you won't find any of that here. That might make me a hack to some and endeared to others. To each their own. Oh, and please excuse the fact that all of my raid boss references are limited to Mogu'Shan Vaults. It's been a slow, slow tier for our guild.
TL;DR: Damage largely unaffected, some nice quality-of-life improvements.
Conductivity no longer requires that the target be within the area of effect of Healing Rain.
I don't know if it's the way the tooltip is worded or if it's the limitations of my brain, but this change confuses the shit out of me. Perhaps a fellow enhancer who uses it can weigh in.
At present, Conductivity causes certain damaging attacks to heal your allies standing in your Healing Rain if the enemy or enemies you're attacking are also standing in your healing rain. Phew. Yeah, it can't be just me. So the question is, stack much? Answer: nah, just occasionally, and for short durations, so this talent kind of sucks for enhancement, although elemental shaman may report having a better time.
5.2's change doesn't do much to change its attractiveness for enhance. The major difference is that your target no longer needs to be standing in your healing rain, meaning damaging any enemy no matter where they stand will now provide additional healing to allies so long as they are standing in your Healing Rain. That's less confusing, right? This assumes you even want to use a global CD to toss about an instant-cast Healing Rain. Mmmmmeh.
If any enhancement out there can think of a situ where this talent rocks it, let me know.
Chain Lightning will now deal the same damage to subsequent targets as it does to the first.
Neeto. In the past I've reserved Chain Lightning for fights with three or more targets. This change will definitely affect our AoE damage, but won't do anything to single-target DPS.
Elemental Mastery now has a 90 second cooldown (was 2 minutes).
When the pre-MoP patch dropped, I chose all passive talents in order to grow accustomed to any new quirks in the rotation. Given that, I haven't really messed with this talent, though it does offer a significant benefit on fights with critical burn phases, or fights where players do increased damage. Essentially, it provides us a personal Bloodlust every 90 seconds. The reduced CD in 5.2 brightens its appeal and I will be trying this out. Elegon, Will of the Emporer and Gara'jal come to mind.
Ancestral Swiftness passively increases spell haste by 5% and melee haste by 10%, instead of 5% each.
Personally, I've stuck with Echo of the Elements for this entire tier; had DPS been the reason why our guild progression was slow, I would have experimented more. With this talent's buff to melee haste come 5.2, I'm still having a hard time identifying fights where it would have the clear advantage. Perhaps the fact this is changing ONLY for enhancers is a sign of Blizzard trying to make this talent seem more appealing. If that's the case, I'm not sure it worked.
Stone Bulwark Totem now absorbs 25% more damage.
The most appealing aspect of this talent to me has always been its relatively short cooldown. Using either this talent or Astral Shift with Shamanistic Rage provides massive damage reduction. From what I can tell, Stone Bulwark Totem would be best chosen for fights with regular, constant damage where as Astral Shift may be better for fights where there are instances with high damage spikes.
I choose this talent when leveling to 90, but once the guild began raids, I put my trust in our healers and opted for Astral Shift to steal of a few more seconds of aliveness during those really sticky situations, like when I shaman tank. You see, enhancement shaman tanking isn't a choice. It's a lifestyle.
Unleashed Fury - Flametongue now increases Lightning Bolt damage by 20% (was 30%), and Lava Burst damage by 10%.
Now, where did I put that.....aha! NERF BAT! No, not really. We get a slight reduction to the damage this talent effect provides, meaning it will ever-so-slightly decrease our single-target DPS. It's not a nerf.
Glyph of Flame Shock has been redesigned. This glyph now causes the Shaman to heal for 50% of the damage dealt by Flame Shock.
Prior to 5.2, most theory-crafters I rely on maintained that Glyph of Flame Shock was mandatory for enhancement shaman. Why? Flame Shock's increased duration keeps the global cooldown freer for longer, increasing overall damage. Blizzard seems to have acknowledged its mandatory nature by incorporating the glyph's function into the base ability: come 5.2, Flame Shock's duration has been increased by 25%.
Applying the glyph causes the shaman to heal for 30% of the damage done by Flame Shock. This may mean we have some more interesting choices when it comes to filling that glyph slot.
Ancestral Guidance now copies 60% (was 40%) of the amount healed.
Mwahahahahaha. I really like this talent. The sheer utility of the shaman is probably one of the reasons it soon grew to be my favorite class. When timing its use with some of my damage cooldowns, it can really help our raid healers in a pinch. As we mentioned earlier, Conductivity is a moot choice, so that leaves Healing Tide Totem, a talent I opted for at the start of the expansion. Now that I have more control over my burst, I've found Ancestral Guidance to be more beneficial overall, even if it heals only the 3 nearest raid members as opposed to Healing Tide Totem's five.
And now we get to do even more healing? Count me in.
Spirit Walk's cooldown has been reduced to 1-minute (was 2 minutes).
This. is. huge. To me. I'm a baaaaaaad shaman, and don't have Spirit Walk keybound. It will remain that way until 5.2, because with a 1-minute CD, this thing will become extremely useful. Perhaps only situationally in raids, but for day-to-day getting around? Mmm hmm.
There are some other minor changes in the official notes, like the change to the AoE damage cap, but nothing earth-shaking. What about you? What has you most excited about these looming changes to enhancement shaman?
Thursday, February 21, 2013
Bashes with Wolves: Mount farming with your enhancement shaman
Before anything, I need to thank Ravyncat for the post title. Enhancement is my true love, and has been since I discovered it five years ago. So I wanted a title worthy of what it meant to me. But I'm no good at those things, so I asked Twitter. Ravyncat answered with something far better than anything I'd thought of. So here it is. Bashes with Wolves.
It wasn't until I brought Malygos down to 0.1% before the end of phase 1 that I was truly happy with enhancement soloing capabilities. Not that it was a huge feat, but it proved to me that enhancement had the burst and survivability at level 90 to easily solo fights that for some classes still prove quite difficult. So I figured why not put together a mount farming guide from the enhancement shaman perspective. I've listed them in order of relative ease, starting with the facerolls. I think I have them all here, but please let me know if I've missed something. If you have issues with any of these fights, please leave a comment and I will try to help.
Location: Karazhan Raid in Deadwind Pass
Has a 1.1% chance to drop: Fiery Warhorse's Reigns
This guy is easily accessible as the closest boss to the entrance. Head inside and follow the grey cobblestone path. You'll run into him after a series of trash mobs. At a lower level I would have killed the trash before engaging Attumen, since pulling him also pulls any remaining trash. At 90, he won't be any trouble at all. Head straight for him and use passive AoE to finish off any mobs you didn't kill.
Has a 0.9% chance to drop: Deathcharger's Reigns
I listed this pushover after Attumen only because Aurius is located all the way at the rear of the Gauntlet side of Stratholme. To enter, head to the Eastwall Gate at 43,20 in Eastern Plaguelands. Before we can reach Aurius, we have to kill four bosses and some specific trash packs. Thankfully, the only danger we face in here is being overcome with boredom: the dungeon can be tedious, especially if you want to run it several times in a row (since it's a dungeon, you can up to five times in an hour's time before Blizzard locks you out). I'll warn you, it gets old after run number two.
On the map I've marked which bosses you need to kill as well as the route I prefer to take. I normally gather as much trash as I can and bring them into the "ziggurats," the buildings being guarded by bosses 1-3, because it makes for easy grouping. Inside each of the ziggurats are several Thuzadin Acolytes. These mobs must die in order get to Aurius. If you can't access boss #4's area, check all three ziggurats. Once in boss #4's area, kill all of the Abominations in order to trigger the boss. After he's dead you'll be able to get to Aurius.
It took me a while to get comfortable with this run, but with practice and mass looting I'm now in and out in just over five minutes.
Tips: come with empty bags, especially if you're planning multiple runs. The trash and bosses drop lots of cloth, armor, weapons and junk worth hanging on to sell. For a quick port to the entrance after killing Aurius, enter into a party with a friend or guildie. Then, simply leave the party to get ported to the nearest graveyard, which just happens to be within spitting distance of the Eastwall Gate. It's like Blizzards wants you to farm it.
Has a 1.5% chance to drop: Reigns of the Blue Proto-Drake
Though Skadi is the third boss in Utgarde Pinnacle, it's not too much trouble getting to him. Make sure you have it set on heroic! Because it's heroic, your shaman is limited to one attempt per day. If you want to maximize your daily chances at this mount, almost any decently geared level 85 toon can easily solo this place.
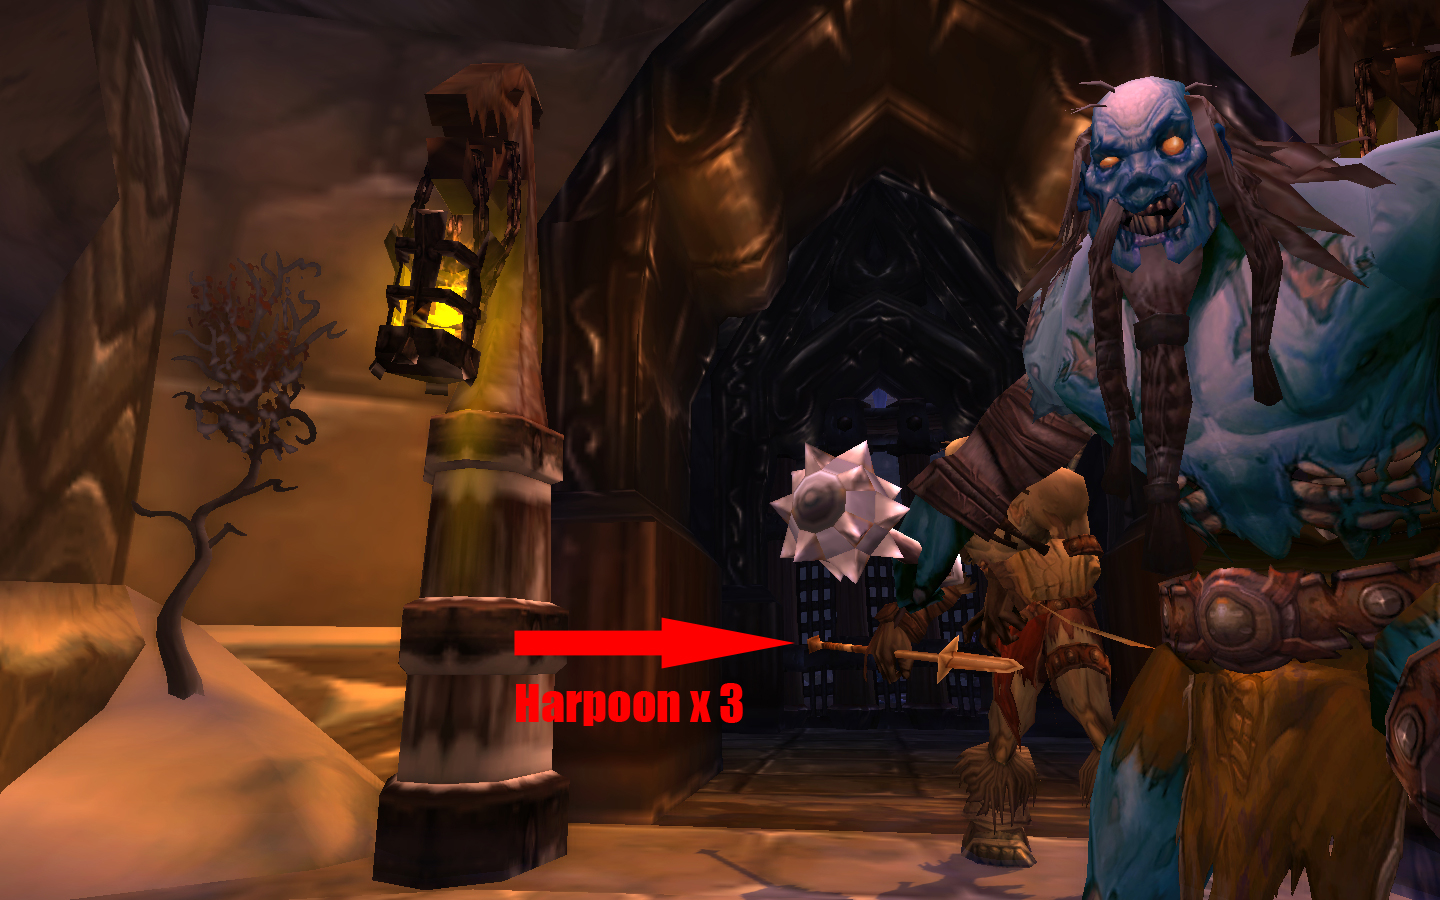
After the second boss is dead, I usually enter ghost form and sprint down Skadi's gauntlet as quickly as I can, which pulls his trash to the far end for easy grouping and AoE. Focus down the Harpooners and three spears later you'll find Skadi to be an easy burn.
Has a 0.9% chance to drop: Reigns of the Onyxian Drake
Onyxia only has a normal mode and the reigns drop in both 10- and 25-player versions, but we're going to focus on 10-player because why would you want to make it more difficult on yourself? I still employ a specific strategy during this fight just to make my life easier. It is possible to die here if you're not careful, though trash won't be an issue.
As for Ony: I pull her with Unleash Elements as soon as I'm in range, then pop a Virmen's Bite potion and Feral Spirit (orcs should use Blood Fury here, too). I'll usually drop a Searing Totem for good measure. This pushes her to phase 2 rather quickly, which is when she takes flight. Since she thinks flying just a few feet out of the reach of our fists will grant her safety, hit Ascendance just to make sure she knows she's wrong. Between the damage from Ascendance, Flameshock and instant Lightning Bolts, she grounds herself pretty quickly. Once she's on the ground, I drop Stormlash Totem, Fire Elemental Totem and then I Lust, keeping Tremor Totem at the ready if she gets a fear off.
Aside from the chance for a mount, she always drops a nice bag (if you don't have it already), a sack of gems to potentially sell on the auction house and cool-looking replica tier gear.
Has a 0.9% chance to drop: Reigns of the Vitreous Stone Drake
Lucky for us, Slabhide drops the mount in both normal and heroic versions, so it's very much farmable. Normal version should be a breeze at 90; if you fancy a bit more of a challenge, go for it on heroic, though the source I linked reports the drop rate as being the same.
I focus Millhouse Manastorm first, which causes him to retreat after so much damage. Instead of killing the remaining mobs, I follow Millhouse to his next location, using Earthgrab Totem to slow the pursuit of the previous group. I do this until he retreats for the final time, then burn down the dangerously large number of mobs I've accumulated, using survival cooldowns (Shamanistic Rage, Ancestral Guidance, and Astral Shift) with instant Healing Waves to avoid death. For Corborus, I usually pop wolves if I didn't already blow them on the previous pull. If in a hurry, use offensive cooldowns to kill Corborus before it burrows. Cause that's just annoying.
It is possible to skip each mob between Corborus and Slabhide if you time your run correctly. Slabhide will go down easily, just don't stand in stuff. I usually burn whatever offensive cooldowns I have left. If you plan to farm, don't run back to the entrance; instead, look for the portal ahead past Slabhide. Using it will take you to the dungeon entrance where you can pop out, reset, and try again..
Has a 0.9% chance to drop: Reigns of the Drake of the North Wind
Like the Stonecore, the mount here drops on both normal and heroic versions of the dungeon. By default, we'll focus on normal. Comparedo to Stonecore, I kind of have to pay attention here. Keep an eye on your health and don't hesitate to burn some defensive cooldowns if you get in a tight spot.
The trash in here should give you more trouble than the first boss. Once at Slabhide, fight upwind and the drake will go down in a matter of seconds. If you're going for multiple runs, simply jump off the edge of the dungeon into the clouds/sky and you'll be taken back to the dungeon start. For those of you still working on the Cataclysm dungeon meta achievement for the drake, don't forget about Extra Credit Bonus Stage which can easily be done solo (though it must be on heroic).
Has a 100% to drop: Reigns of the Black Drake (10) or Reigns of the Twilight Drake (25)
What? You mean I'm guaranteed to get this mount?!? Kinda. Sartharion is the only boss who is guaranteed to drop the mount we're after as long as we kill him in a specific way. That specific way means leaving his three drakes alive. I'll be straight: I haven't been able to solo him on 25-player. 15% is as far as I can get before dying a speedy and painful death. Part of me thinks I'll eventually be able to eek out that last bit of health, but it may depend on a couple of gear upgrades.
10-player? I once resorted to bee-lining for Sarth, ignoring not only his drakes but the trash as well, blowing all my cooldowns just to see if I could kill him before the trash and drakes overwhelmed me. The good news is, with enough burst this is totally possible. The bad news is you'll still probably end up dying. Tit for tat, amirite? The best way to go about it is to clear all of the trash while avoiding the three drakes, then head down to Sarth's area. I engage him using my standard burst sequence: Virmen's Bite, Blood Fury (orc racial), Feral Spirit, Stormlash Totem, Stormstrike, Ascendance, and Fire Elemental Totem followed by Bloodlust.
In addition to the drake, Sarth drops a 22-slot bag, a satchel of spoils, gear and some WoTLK era armor tokens. If you're set on doing the 25-player version, bringing along a solid DPS or two should be all you need. Remember that 10- and 25-player versions share a lockout so you'll only be able to acquire one of these in a given week with your shaman.
Has a chance to drop: Reigns of the Azure Drake (4%) and Reigns of the Blue Drake (?%)
I actually had to devise follow a strategy in order to solo this encounter. I've accomplished this with an approximate gear level of 480, though a shaman more skilled than I could probably get away with less. I haven't even attempted Malygos-25; both drakes can drop from the 10-player version.*
Right-click the orb in the center of the room to engage Malygos. The first part of the fight is a simple burn phase. The transition to phase 2 begins at 50% but we don't want that to happen too quickly. We won't be using any cooldowns or burst at the beginning, because in order to defeat Malygos, we need to take advantage of one of the fight's original mechanics: Power Sparks.
Power Sparks will spawn from one of the vortexes surrounding the edge of the platform and slowly advance towards Malygos. Firstly, you can't allow these to reach Malygos, as that makes him angry. Secondly, we need to kill two of these right on top of each other because stacking in the puddle they leave behind grants a +50% damage bonus. With two sparks killed on top of one another we get a +100% bonus to damage. This is why we don't burn Malygos right away: we need the extra damage from Power Sparks in order to maximize the amount of damage we can do while Malygos transitions into phase 2.
Try to bring Malygos down to around 60% before the first spark comes out. He may toss you around in his whirlwind once or twice. No worries. I have a targeting macro set up so I don't miss the sparks. Be careful not to kill them too soon; they can be 1-shot, meaning they can die before ever reaching the platform, which does you no good. Once you have two sparks killed at the same location, stack in the puddle they've left and pop your burst cooldowns. I recommend: Virmen's Bite, Feral Spirit, Stormlash Totem, Stormstrike, Ascendance, and Fire Elemental Totem followed by Bloodlust.
At 50%, Malygos will begin the transition to phase 2 by moving the the middle of the room and giving a little speech. You can ignore what he says. The thing is, he is still attackable at this point and we need to take advantage of this. At a certain point he can't be hit with melee attacks, so you may want to experiment a little with the burst sequence. I actually talented into Elemental Mastery and Primal Elementalist the first time I solo'd him and waited til I couldn't reach him with melee to hit Ascendance. Malygos is NOT killable until phase 3, but I've found that with enough burst we can push him to 0.1% before phase 2 begins. As you can guess, doing this essentially eliminates phase 3.
Once phase two begins, kill a Scion then hop onto his freaky-deeky hovercraft to take care of the rest of the lot. Once the last scion is dead, the transition into phase 3 will begin. For those unfamiliar, phase 3 involves a drake vehicle that has several abilities. We'll be focusing on three of them: Revivify, Flame Spike and Engulf in Flames. But before we fight, Malygos lives up to his reputation for giving speeches and once again unleashes a short verbal tirade. This is a good time to build up five stacks of Revivify. Also, you may have to fly straight up to center Malygos in your view.
After his speech, kill him by using the following cast sequence: Flame Spike, Flame Spike, Engulf in Flames, Revivify (often times 1, 1, 2, 3 when hot-keyed). Ideally, Malygos will have been at 0.1% from phase 1, causing your first Flame Spike to instantly kill him.
*Extensive commentary on WoWhead, including recent ones, indicate that both the Blue and Azure Drakes have a chance to drop from Malygos. The Blue Drake used to have a chance to drop in the Oculus when players were given the Oculus as a random heroic. Hence, it does NOT have a chance to drop if you simply fly there yourself. I'll update this if I learn I have bad info.
I hope you've found this guide helpful. Good luck!
It wasn't until I brought Malygos down to 0.1% before the end of phase 1 that I was truly happy with enhancement soloing capabilities. Not that it was a huge feat, but it proved to me that enhancement had the burst and survivability at level 90 to easily solo fights that for some classes still prove quite difficult. So I figured why not put together a mount farming guide from the enhancement shaman perspective. I've listed them in order of relative ease, starting with the facerolls. I think I have them all here, but please let me know if I've missed something. If you have issues with any of these fights, please leave a comment and I will try to help.
Attumen the Huntsman
![]() |
| Follow the grey-bricked road? |
Has a 1.1% chance to drop: Fiery Warhorse's Reigns
This guy is easily accessible as the closest boss to the entrance. Head inside and follow the grey cobblestone path. You'll run into him after a series of trash mobs. At a lower level I would have killed the trash before engaging Attumen, since pulling him also pulls any remaining trash. At 90, he won't be any trouble at all. Head straight for him and use passive AoE to finish off any mobs you didn't kill.
Lord Aurius Rivendare
Location: Stratholme Dungeon in Eastern PlaguelandsHas a 0.9% chance to drop: Deathcharger's Reigns
I listed this pushover after Attumen only because Aurius is located all the way at the rear of the Gauntlet side of Stratholme. To enter, head to the Eastwall Gate at 43,20 in Eastern Plaguelands. Before we can reach Aurius, we have to kill four bosses and some specific trash packs. Thankfully, the only danger we face in here is being overcome with boredom: the dungeon can be tedious, especially if you want to run it several times in a row (since it's a dungeon, you can up to five times in an hour's time before Blizzard locks you out). I'll warn you, it gets old after run number two.
![]() |
| And for your convenience I've included this handy-dandy map... |
It took me a while to get comfortable with this run, but with practice and mass looting I'm now in and out in just over five minutes.
Tips: come with empty bags, especially if you're planning multiple runs. The trash and bosses drop lots of cloth, armor, weapons and junk worth hanging on to sell. For a quick port to the entrance after killing Aurius, enter into a party with a friend or guildie. Then, simply leave the party to get ported to the nearest graveyard, which just happens to be within spitting distance of the Eastwall Gate. It's like Blizzards wants you to farm it.
Skadi the Ruthless
Location: Utgarde Pinnacle Heroic Dungeon in Howling FjordHas a 1.5% chance to drop: Reigns of the Blue Proto-Drake
![]() |
| If you want to get to him you'll have to go through me! |
After the second boss is dead, I usually enter ghost form and sprint down Skadi's gauntlet as quickly as I can, which pulls his trash to the far end for easy grouping and AoE. Focus down the Harpooners and three spears later you'll find Skadi to be an easy burn.
Onyxia
Location: Onyxia's Lair Raid in Dustwallow MarshHas a 0.9% chance to drop: Reigns of the Onyxian Drake
![]() |
| Have...have we met before? |
As for Ony: I pull her with Unleash Elements as soon as I'm in range, then pop a Virmen's Bite potion and Feral Spirit (orcs should use Blood Fury here, too). I'll usually drop a Searing Totem for good measure. This pushes her to phase 2 rather quickly, which is when she takes flight. Since she thinks flying just a few feet out of the reach of our fists will grant her safety, hit Ascendance just to make sure she knows she's wrong. Between the damage from Ascendance, Flameshock and instant Lightning Bolts, she grounds herself pretty quickly. Once she's on the ground, I drop Stormlash Totem, Fire Elemental Totem and then I Lust, keeping Tremor Totem at the ready if she gets a fear off.
Aside from the chance for a mount, she always drops a nice bag (if you don't have it already), a sack of gems to potentially sell on the auction house and cool-looking replica tier gear.
Slabhide
Location: Stonecore Dungeon in DeepholmHas a 0.9% chance to drop: Reigns of the Vitreous Stone Drake
![]() |
| Race ya! |
I focus Millhouse Manastorm first, which causes him to retreat after so much damage. Instead of killing the remaining mobs, I follow Millhouse to his next location, using Earthgrab Totem to slow the pursuit of the previous group. I do this until he retreats for the final time, then burn down the dangerously large number of mobs I've accumulated, using survival cooldowns (Shamanistic Rage, Ancestral Guidance, and Astral Shift) with instant Healing Waves to avoid death. For Corborus, I usually pop wolves if I didn't already blow them on the previous pull. If in a hurry, use offensive cooldowns to kill Corborus before it burrows. Cause that's just annoying.
It is possible to skip each mob between Corborus and Slabhide if you time your run correctly. Slabhide will go down easily, just don't stand in stuff. I usually burn whatever offensive cooldowns I have left. If you plan to farm, don't run back to the entrance; instead, look for the portal ahead past Slabhide. Using it will take you to the dungeon entrance where you can pop out, reset, and try again..
Altairus
Location: Vortex Pinnacle Dungeon in UldumHas a 0.9% chance to drop: Reigns of the Drake of the North Wind
![]() |
| Vortex Pinnacle bears a subtle resemblance to Wrathion. |
The trash in here should give you more trouble than the first boss. Once at Slabhide, fight upwind and the drake will go down in a matter of seconds. If you're going for multiple runs, simply jump off the edge of the dungeon into the clouds/sky and you'll be taken back to the dungeon start. For those of you still working on the Cataclysm dungeon meta achievement for the drake, don't forget about Extra Credit Bonus Stage which can easily be done solo (though it must be on heroic).
Sartharion
Location: The Obsidium Sanctum under Wyrmrest Temple in DragonblightHas a 100% to drop: Reigns of the Black Drake (10) or Reigns of the Twilight Drake (25)
![]() |
| What? Why are you looking at me like that? |
10-player? I once resorted to bee-lining for Sarth, ignoring not only his drakes but the trash as well, blowing all my cooldowns just to see if I could kill him before the trash and drakes overwhelmed me. The good news is, with enough burst this is totally possible. The bad news is you'll still probably end up dying. Tit for tat, amirite? The best way to go about it is to clear all of the trash while avoiding the three drakes, then head down to Sarth's area. I engage him using my standard burst sequence: Virmen's Bite, Blood Fury (orc racial), Feral Spirit, Stormlash Totem, Stormstrike, Ascendance, and Fire Elemental Totem followed by Bloodlust.
In addition to the drake, Sarth drops a 22-slot bag, a satchel of spoils, gear and some WoTLK era armor tokens. If you're set on doing the 25-player version, bringing along a solid DPS or two should be all you need. Remember that 10- and 25-player versions share a lockout so you'll only be able to acquire one of these in a given week with your shaman.
Malygos
Location: The Eye of Eternity Raid in Borean TundraHas a chance to drop: Reigns of the Azure Drake (4%) and Reigns of the Blue Drake (?%)
I actually had to devise follow a strategy in order to solo this encounter. I've accomplished this with an approximate gear level of 480, though a shaman more skilled than I could probably get away with less. I haven't even attempted Malygos-25; both drakes can drop from the 10-player version.*
Right-click the orb in the center of the room to engage Malygos. The first part of the fight is a simple burn phase. The transition to phase 2 begins at 50% but we don't want that to happen too quickly. We won't be using any cooldowns or burst at the beginning, because in order to defeat Malygos, we need to take advantage of one of the fight's original mechanics: Power Sparks.
![]() |
| Somewhere in a galaxy far, far away... |
Try to bring Malygos down to around 60% before the first spark comes out. He may toss you around in his whirlwind once or twice. No worries. I have a targeting macro set up so I don't miss the sparks. Be careful not to kill them too soon; they can be 1-shot, meaning they can die before ever reaching the platform, which does you no good. Once you have two sparks killed at the same location, stack in the puddle they've left and pop your burst cooldowns. I recommend: Virmen's Bite, Feral Spirit, Stormlash Totem, Stormstrike, Ascendance, and Fire Elemental Totem followed by Bloodlust.
At 50%, Malygos will begin the transition to phase 2 by moving the the middle of the room and giving a little speech. You can ignore what he says. The thing is, he is still attackable at this point and we need to take advantage of this. At a certain point he can't be hit with melee attacks, so you may want to experiment a little with the burst sequence. I actually talented into Elemental Mastery and Primal Elementalist the first time I solo'd him and waited til I couldn't reach him with melee to hit Ascendance. Malygos is NOT killable until phase 3, but I've found that with enough burst we can push him to 0.1% before phase 2 begins. As you can guess, doing this essentially eliminates phase 3.
Once phase two begins, kill a Scion then hop onto his freaky-deeky hovercraft to take care of the rest of the lot. Once the last scion is dead, the transition into phase 3 will begin. For those unfamiliar, phase 3 involves a drake vehicle that has several abilities. We'll be focusing on three of them: Revivify, Flame Spike and Engulf in Flames. But before we fight, Malygos lives up to his reputation for giving speeches and once again unleashes a short verbal tirade. This is a good time to build up five stacks of Revivify. Also, you may have to fly straight up to center Malygos in your view.
After his speech, kill him by using the following cast sequence: Flame Spike, Flame Spike, Engulf in Flames, Revivify (often times 1, 1, 2, 3 when hot-keyed). Ideally, Malygos will have been at 0.1% from phase 1, causing your first Flame Spike to instantly kill him.
*Extensive commentary on WoWhead, including recent ones, indicate that both the Blue and Azure Drakes have a chance to drop from Malygos. The Blue Drake used to have a chance to drop in the Oculus when players were given the Oculus as a random heroic. Hence, it does NOT have a chance to drop if you simply fly there yourself. I'll update this if I learn I have bad info.
I hope you've found this guide helpful. Good luck!
Subscribe to:
Posts (Atom)